Lately, I have often found myself in difficult but similar situations. Their similarity lay in the fact that my field of vision constantly began to come across used things, partly working, partly faulty. In order to “create” something through their transformation and improvement, of course, first of all it is necessary to bring them into proper form, since usually there is a lot of dust and dirt, well, what could we do without it! So you have to take a brush, a brush and go ahead: with the help of cologne, wipe all kinds of hard-to-reach parts and mechanisms. But everything would be fine, but it doesn’t happen that simple in the white world. It takes a particularly long time to tinker with coolers. If not for these coolers! Neither crawl up nor blow properly with feeling, properly, with arrangement, so to speak, because the dust is “imprinted” into them. So what should we do? The answer to this question is simple - search engines Yandex and Google. But, alas. I have not found comprehensive information on this matter. So I decided to collect all kinds of coolers and write something like an article about them - accessible and simple, illustrating with pictures the disassembly of the “winged ones”. Maybe my article will close the topic coolers!
Fig 1. Here are some types of coolers

Fig 2. Stickers have been eliminated, but the Chinese don’t put corks on all of them, that is, it’s hack work.
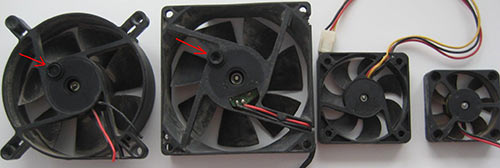
Fig. 3. The plugs are removed using needles, and in general the entire disassembly is done using two needles.
By the way, do not throw away the stickers, as they will come in handy in due time - this way the mechanism is less susceptible to dust.

Fig 4.
Having removed the washer, we make sure that it does not inadvertently sink into oblivion, since it is made of plastic. Next, remove the rubber washer. Now we calmly clean, rinse and lubricate. I use sewing machine oil for these purposes.
When the system unit is operating, you can hear a hum. This worries many computer users. At first, the noise occurs when the system unit is turned on, but disappears after a few minutes. This noise comes from one of the coolers.
The noise disappears because the grease heats up and flows into the bearing, lubricating it. However, after a while the noise becomes constant as the lubricant has run out. If there is noise in the cooler, it is necessary to lubricate the bearing. If this is not done, it will wear out and you will have to purchase a new fan.
Bearings can be lubricated using machine oil. Using different types lubricants, I chose the best one that is suitable for bearings. It can be either made independently or purchased. If there is no oil, you can use motor oil, a couple of drops of which can be obtained when checking the level in the engine.
However, lubrication of ball (rolling) and sliding bearings does not always give good results. Since noise can occur due to wear of the race, axle, bushing. In this case, the lubricant will reduce the noise for a while. If slow rotation of the cooler is detected (the reason the computer freezes, the processor overheats) or noise caused by thickening or complete drying of the lubricant, new lubricant will double the life of the fan.
How to disassemble a computer cooler
Structurally, the coolers are no different. Be it fans of the power supply, processor, video card. There are several differences - performance and mounting method. Disassembling, lubricating and assembling coolers occurs in the same order.
In order to lubricate the cooler, you should remove it from the radiator, then disassemble it. Without removal, it will not be possible to carry out lubrication work, since the surface with lubricant is pressed against the radiator. If the cooler is located on the processor radiator, it is secured with latches that are not noticeable the first time. Before you begin disassembling the cooler, you need to peel off the emblem from the side on which the wires are located. It is glued with a sticky layer. You need to peel it off slowly without damaging anything.
Some coolers have a rubber stopper. It is removed using a sharp instrument. You just need to pry it around the edges. This is done with the slightest effort, since the cork is not glued.
The cooler impeller is held in place by a plastic flat washer, which is cut and fixed in the place where the axle is grooved. To remove the impeller, you need to remove this washer.
You will have to use two tools to remove it. It is difficult to determine the location of the cut by eye, so we use a needle to pass along the surface of the washer, pressing lightly until we feel this place. Use a screwdriver to press the washer near the cut site, and use an awl or needle to pry up the other side. After these steps, the washer will come out of the groove.
This operation must be done carefully without breaking or losing the washer. It happens that it flies away and you have to look for it. If the washer is lost, the cooler will not work. For the reason that there will be nothing to press the impeller with. Next, remove the rubber ring, then remove the impeller itself. There is another ring on its axis, which also needs to be removed.
A cooler that has been in use for a long time has worn out rubber rings. They can be either completely erased or partially. Often, worn-out pieces remain in place of the rings. It is not possible to find rubber rings on the market; such small spare parts are not sold.
A lubricated bearing will not stop making noise if the races are not in place. Since there will be an axial displacement of the impeller. You can look for old fans, maybe they have at least one surviving ring.
Often, the rings that are located in the location of the locking washer quickly wear out. The entire work load rests on him. If there is a surviving ring, it must be installed on the axle in front of the washer that secures the impeller. Then the cooler should work quietly. If this does not happen, you will have to get used to the noise or purchase a new cooler.
How to lubricate a cooler
Before lubricating the cooler, take a cloth, moisten it with any solvent and remove all wear debris along with the old lubricant. Especially clean the bearing bushing bore dry. Apply a thin layer of lubricant to the rubbing parts of the cooler, and reassemble in the reverse order.
If you find that the label is torn or does not want to stick in place, wipe the surface of the cooler to remove any remaining oil. If the sticker still doesn't want to stick, use tape instead. It will protect the cooler bearing from dust.
Graphite is used as a lubricant because it has scaly crystals, which in turn provide a thin surface coating. Oil acts as a binder for graphite. Self-prepared lubricant applied to the bearing surface will provide long term cooler operation. Since it contains graphite and synthetic oil.
Making your own graphite lubricant for the cooler
In order to prepare your own lubricant, you should take a couple of drops of synthetic oil and add graphite. All this is mixed until a homogeneous mass is formed. The resulting lubricant should be thick.
It is better, of course, to use industrial lubricant.
Some components and parts of a computer and laptop require regular maintenance. For example, a fan or, as it is also called, a cooler. It is installed to cool the processor, power supply and video card. On some motherboards, the fan is installed on the south bridge. If you don’t regularly clean and lubricate the cooler, it will become clogged with dust and will even begin to make noise, irritating those around you with a wild roar when turned on, and later - constantly during operation. And this is not “buzz”. Therefore, I advise you not to take it to extremes, but to lubricate the fan on the processor and video card in a timely manner. I will now clearly show you how to do this.
Computer fan bearing grease
How can I lubricate the cooler? For these purposes, ordinary household machine oil is best suited. WD-40 penetrating lubricant is also excellent for these purposes:
Also in electronics stores you can find special lubricants for coolers such as silicone oil or Tsiatim 203 or 221 lubricant, FIOL. In extreme cases, Litol will do.
What cannot be used for lubricating computer fans? Firstly, it is vegetable or butter, animal fats, petroleum jelly or petroleum jelly, water-based lubricants, various creams and moisturizers.
We’ve decided what we’re going to apply, now let’s move on directly to action.
Step 1: Disassemble the cooling system
We start by removing the fan from the processor or video card heatsink. On many models of CPU coolers, you can simply remove them by unscrewing 4 screws.
In more complex cases, you will have to remove everything completely, along with the radiator, and then disassemble it. In the case of a video card, everything is the same. On laptops it’s even more difficult - usually you need to disconnect the entire “snail” along with the cooler:
After dismantling is completed, be sure to wipe the dust from the blades and body with a damp cloth or cloth.
Step 2. Tear off the sticker
On every computer fan There is a sticker that blocks access to the locking coupling. Carefully peel it off so that you can glue it back:
Under the sticker there may also be a plastic or rubber plug:
It also needs to be removed.
Step 3: Lubricate the CPU or graphics card fan shaft
At this stage, you need to be careful not to fill everything with grease, drop oil or spray WD-40 on the cooler axle:
By the way, it is most convenient to lubricate the fan with machine oil using a regular 5 ml syringe - simply and accurately.
After that, we return the plug back and glue the sticker back.
How to disassemble the cooler?!
In some cases, when the valve in use has not been cleaned for a long time and is filled to the brim with dust so that the blades are difficult to rotate, it is best to completely disassemble it, clean it and anoint it.
To do this, you need to very carefully remove the locking coupling:
Or a rubber locking ring:
After this, you can completely remove the fan blades along with the shaft. The electric motor itself will remain:
Typically one bearing is used. In some cases there may be two of them, as in my example. Then the second one must be carefully removed. First, the O-ring:
Now you need to use cotton swabs to completely clean the insides of dirt, dust and old grease:

If your computer began to make extraneous or very loud noise, squeaking, squealing during its operation, this means that it is time to clean and lubricate the cooling fans. They are most often installed at least on radiators processor, video cards, inside power supply And computer case.
First you need turn off power supply: Unplug power cords, disconnect laptop battery. Theoretical part, which outlines the problems associated with accumulation in device cases dust, is set out in the article "Maintenance (MRO) and repair of computer equipment."
Runs first dust removal all nodes and boards. To do this, you will need a long-haired brush, a vacuum cleaner, a can of compressed air, a set of screwdrivers, napkins, cotton wool, alcohol, lubricant (graphite grease, machine oil), and thermal paste.
First of all, it is opened computer case and cleaning of dust settled inside is carried out. This will get rid of the bulk of dust and prevent dust from flying around the room. Cleaning must be done carefully to avoid damaging electronic equipment. You need to be very careful when vacuuming inside a PC case or cleaning a laptop. It is also advisable to use a brush or brush.
Reference: It is better to completely disconnect the power supply and remove it for further disassembly and cleaning. It’s better to do the same with a video card. It is better to remove fans and radiators immediately too. It is with them that you will have to work.
Radiators cleaned of dust and old thermal paste. Remains of thermal paste are removed with alcohol. The radiator fins must be cleaned especially carefully, because... The cooling efficiency will depend on this in the future.
I would like to dwell on restoring fan operation. The efficiency of the entire cooling system and how quietly your computer will work depend on their operation.
The fans have a similar design inside, and they are also disassembled almost identically. To begin, peel off the sticker on the cooler, under which there is a rubber or plastic plug. It needs to be removed. This can be done using a sharp object or a fingernail. The plug is not secured in any way.
Reference: As a temporary solution, you can use machine oil; it will help until the internal bushings are very worn out. It will be enough to drop a few drops on the metal axle. The procedure will have to be repeated in a few months, you need to keep this in mind.
If cooler It has not been cleaned for a long time or is very worn, it will have to be done completely disassembly, cleaning And lubricant.
For complete disassembly, you will need to remove the impeller, which is held inside the housing by a flat cut plastic washer. This washer (circlip) needs to be removed. But be very careful so as not to break it or lose it. We look for a cut in the retaining ring and remove it.
There may be plastic or rubber rings (bushings) inside; they also need to be removed and remembered how they are installed, so that later you can put everything back in place. Over the years, these rings (bushings) wear out either partially or completely. In this case, you need to look for a replacement for them. Otherwise, you will not be able to get rid of the noise. You will either have to leave it as is, or replace the cooler with a new one.
After disassembly, you need to remove dirt, old grease and wear products from the bushings. Both the hole for the axle and the axle itself need to be cleaned very well. And only after thorough cleaning can lubricant be applied.
Assembly is carried out in reverse order. If you cannot put the sticker back, it is better to replace it with tape. You cannot leave the hole unsealed, because... surplus lubricants after heating they can go back.
Without the necessary skills, knowledge or even tools, it is very easy to disable the equipment. Therefore, it is better to entrust the maintenance of your computer equipment to a qualified specialist.