The veranda is an extension to the house on summer cottage, which is most often erected during the construction of the main building. However, it can be added later. You should not think that the veranda is a separate structure. It represents an important part of the house. To avoid problems with selling or donating property in the future, you should first obtain permission to build a veranda and then register new home. This is due to the fact that living space is increasing. A veranda at the dacha can be erected with your own hands quite quickly - a few days. It is important to choose tools and materials.
Basic rules
The main rule when constructing any veranda is the need to create an extension on the side of the door. This solution will further protect entrance group. Attach a veranda from the end or facade of the house. You can only enter the building through this extension.
The second basic rule is that the style of the extension should be chosen in accordance with the design of the house. To prevent the veranda from becoming an awkward spot against the background of the building, it is worth considering some design recommendations. The width of the veranda is usually 2.5 m. If these conditions are not met, the extension will look rather bulky or too miniature.

There are many forms of verandas. They are performed open - when there is no need to insulate the extension, or closed - in the case of a permanent structure. Open extensions usually do not have a top structure. They only carry out the roof and fencing elements.
Enclosed verandas are most often made with continuous glazing. Depending on the chosen style, the space that is glazed may have a different area. Verandas with an open upper part of the walls can be used both as an entrance extension and as a terrace. In the case of closed extensions, a dining area or hallway is arranged here.

Pouring the foundation
The foundation for a veranda or terrace should be made at some distance from the foundation of the house. This is explained by the difference in weight between the main structure and the extension. The loads on the foundations of the house and its extensions will be different, so they should be installed at a distance of 15 mm from each other. The resulting gap is filled with polystyrene foam. It will compensate for ground movements. To build a veranda at your dacha with your own hands, you will need to know the foundation technology.

A columnar foundation is suitable for a frame-type veranda. It is not difficult to build such a foundation:


Important! Experienced builders recommend adding a veranda to a house made of timber only after it has completely settled. This process can take about 3 years. If you decide to build the veranda before the end of the shrinkage, you will need to attach it to the house using a tongue-and-groove system.
Construction of the extension frame
Now you can begin constructing the extension frame. It is erected from beams with a section of 120x120 mm. Before installation, they should be protected from fire and moisture with special means. The lower harness is made double to make the structure more reliable. In the corners, the timber should be fastened halfway across the tree. The logs are installed at the stage of creating the upper element of the lower frame of the extension.

Depending on the material of the foundation supports of the extension, the method of fastening the lower frame is chosen. Studs can be pre-cast into concrete pillars. Subsequently, a beam is put on them and then secured with a nut.
In the case of brick supports, the strapping is secured using anchors. Metal pins are treated with a special agent that will protect them from corrosion. However, such treatment does not protect the timber from rotting.
The next step is to attach the purlin. The slope of the veranda roof goes under the roofing pie of the house, so its thickness should be taken into account first of all. Usually the purlin is mounted on anchor bolts to the wall of the house. There are many ways that vertical posts can be installed. They can be cut in the half-tree way, using the tongue-and-groove system, or by cutting out ½ of the bottom trim.

How high the racks will be should be determined based on their location. Those supports that are mounted against the wall of the extension will be higher. This ensures the slope of the roof. When calculating the height of the extension racks, it should be taken into account that they are mounted in a cut-out or in a groove. The roof of the extension should have a slope of 12%. This requirement is mandatory for correct installation flexible tiles.
You can create the top frame of an extension quite quickly. The rafter beams should be mounted with one side on the purlin, which is located along the wall of the house, and the other on the top frame. The rigidity of the structure can be ensured by installing jibs. Crossbars mounted between racks must be installed using angles.

Construction of a veranda roof
Traditionally, the roof covering the veranda has one slope. It should be flatter than the slope of the roof of the house. The sheathing for flexible tiles is continuous. It is created from edged boards. Before creating the roofing pie for the extension, you should make sure that the boards are well dried. The humidity of wooden elements should not exceed 20%.
Grooves should be made on the eaves board for installing drainage holders. The boards for lathing should protrude 15 cm beyond the frame supports.

A layer of waterproofing is installed on the finished sheathing. In this case, it is necessary to overlap in the transverse and longitudinal directions. The canvas should be nailed to the boards with galvanized nails. They have one distinctive feature - wide caps. Using bitumen mastic, those places where the waterproofing film overlaps are treated.
Reinforcement of overhangs is carried out using end and cornice strips. They must be nailed down with roofing nails. Laying of flexible tiles is carried out from the center of the roof in both directions. In this case, shingles should be taken from different packs, since they may differ slightly in color.
The protective film should be removed from the shingles immediately before installation on the extension. The shingles are secured with roofing nails. The cap should not damage the roofing material. At points where there is no self-adhesive layer, the material should be coated with bitumen mastic.

Floor and walls
If you plan to make the veranda residential, the floor should be well insulated. To do this, you must first lay a rough covering. A 50x50 mm beam should be laid on top of it. The step between the elements should be 50 cm. The result will be cells for insulation. Penoplex should be placed in them. Then all the cracks are foamed. To figure out how to make a floor in an extension, you will need to study the detailed instructions.
Penoplex should be installed so that there is a distance of about 10 mm between the insulation and the finished floor of the veranda. Thanks to this it will be ensured natural ventilation. Before laying, cover the timber and insulation material with a film that does not allow moisture to pass through. Its joints are connected with metallized tape. The finishing floor of the veranda is laid on top. It must be coated with polyurethane varnish. The floor on an open veranda should be painted with paint that can withstand various exposures to bad weather and sun.

The walls of the veranda must be lined from the outside with clapboard. After fixing the decorative material from the inside, it is necessary to lay waterproofing. Then the foam boards are installed. Inner surface The walls of the veranda are also covered with clapboard.
Window blocks should be installed in the prepared openings of the extension. They are secured with nails. All gaps are foamed. When the foam has completely hardened, the excess areas are cut off. Then the windows and trim of the extension are decorated. They can be painted according to the overall tone of the room. At the final stage of creating a veranda, the ceiling is hemmed and the door is hung.

Interior decoration of the veranda
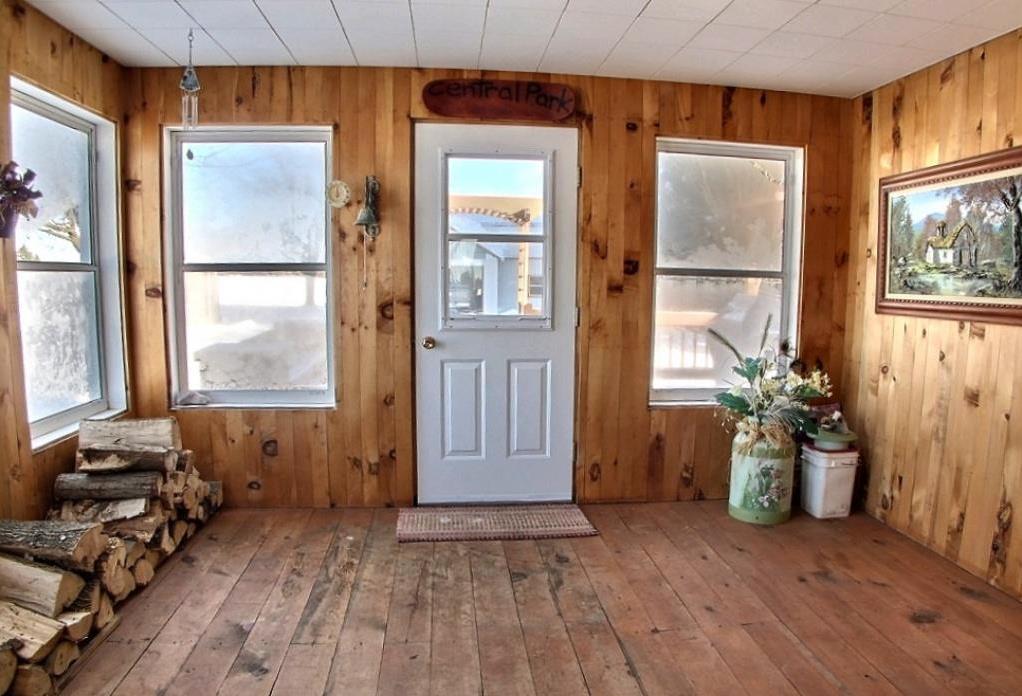
When the main work is completed, you can begin finishing the veranda premises. The inside of the lining is coated with polyurethane varnish. The material should be slightly lighter than the floor. It is better to make the ceiling white. The owner chooses lighting and furniture in accordance with his preferences and capabilities. The photo shows an interesting option for finishing the veranda from the inside.
Building a veranda at the dacha is a rather lengthy process that includes several important stages. The basis of any capital building is the foundation, so you should devote a lot of time and effort to it. Usually for a summer veranda it is enough to build a columnar base. It is able to cope with serious loads, providing good ventilation of the space under the extension.
Conclusions
To create an extension you will need to prepare the necessary tools. An important stage of work is the interior decoration of the veranda. Its style should match the design of the main building. Open verandas can be used as a place to relax, but in bad weather or cold times you will have to go into the house. If the veranda is closed, it is better to insulate it. For this, penoplex or polystyrene foam is used. Such materials perfectly protect the veranda from the cold.

When preparing materials for walls and roofs, you should learn about their properties. For example, you should not use wooden products with a moisture content of more than 20%. In addition, they should be treated with impregnations against rot and fire. Such measures will extend the service life of individual elements of the veranda.
The roof of the veranda should have a slope of about 12 degrees so that precipitation can flow freely into the drainage system. It is better to choose soft tiles for the roofing of the extension. In this case, there will be practically no noise during rain.
A veranda is an extension to a house that shares a common wall with it. Building a veranda is a great opportunity to expand the living space in a dacha or country house without carrying out full-scale construction. In terms of design, it can be absolutely anything, the main thing is that it harmonizes with the main building, is comfortable, functionally corresponds to the tasks assigned to it, pleases the owners of the cottage and arouses the envy of the neighbors.
 Before use, the material for constructing a gazebo must be treated with special insulating solutions that will make the structure resistant to environmental influences.
 As already mentioned, the design of the verandas can be absolutely anything, but the design can be quite different:
On columnar, tape or pile foundation(making a monolith is expensive and difficult);
built-in or attached;
on a common foundation with the house or on a separate one;
under a common roof or under a separate one;
open or glazed;
insulated or summer version (without insulation, but with glazing);
with a frame made of different materials (wood, particleboard, aluminum, steel, and so on);
With different types material for rough cladding;
With various types facial finishing.
Obviously, the choice is incredibly large. But the most common and simple option construction of a veranda can be considered an attached veranda under a separate roof without insulation on columnar foundation. If you do not plan to spend the night in such an extension in the winter and do not intend to build a bulky stove on it, this option is perfect for you. You can choose the type of internal and external cladding at your own discretion: siding, lining, boards, and so on.
 Types of foundation.
 Time frame for constructing a veranda on your own
If the veranda is relatively small (it is customary to make it the entire length of the wall of the house where there is a door) and with a low porch, then all the work can be done literally by two people in the most short terms. Most often, with a 4–6 hour working day, this takes only 4–5 days plus some time for external and interior decoration. An assistant to the chief foreman will be required at the stage of laying heavy beams and at the stage of constructing the roof.
Calculation of a veranda for a country house
A veranda is a structure that requires approval and, accordingly, the preparation of design documentation. Only certified specialists can do this, so, most likely, it is they who will make you a project based on your sketch, on the basis of which you can calculate the necessary materials.
However, if you decide not to legalize your extension, you can do the calculations yourself. Most home craftsmen make do with an approximate diagram and try to obtain more accurate data only for the number of beams and roofing material - both of them most often have to be purchased and transported from afar, and everything else can usually be “obtained” somewhere nearby.
When designing a veranda, you need to take into account that most often the timber that will be used for the construction of vertical posts, for the lower and upper trim and for logs, has a length of 6 meters. So, in order not to make unnecessary cuts and not throw away unnecessary materials, it is worth choosing the appropriate dimensions of the veranda.
 Sketch of the veranda.
 Total we need
Cement;
sand and water for solution;
brick (or ready-made concrete blocks, which are sold in construction stores) for installing foundation columns (every 1.5–2 meters);
timber 150×150 or 100×100;
edged board 40×100;
durable steel corners;
nails;
bitumen for foundation treatment;
waterproofing (roofing felt or durable polyethylene);
roofing material;
materials for external and internal cladding.
 Frameless glazing of the veranda.
 DIY veranda construction
After the rough calculations have been made and the material has been purchased, you can move on to the next stage - marking the area. It should be taken into account that the attached veranda will have a separate base from the main part of the cottage or dacha. And since they have different reasons and different weights, during freezing and thawing of the soil, each of the structures will “float”, that is, rise and fall, completely according to its own physical laws. This means that if we try to “link” the veranda and the house, then sooner or later they will still move away from each other. Accordingly, we leave a gap of 5–10 centimeters between them, which we then close with a special strip.
 Veranda at a country house.
 Stage 1. Building the foundation for the veranda
After we have hammered pegs along the wall in those places where we will install pillars for the foundation, we can proceed directly to the excavation work. The markings must be taken very seriously: subsequently you will not have to level out defects by complex adjustment of the top trim and rafters. Marking pegs should be located on the outside of the veranda walls.
Under the pillars, we dig holes about 50–70 centimeters deep and make a “cushion” for the future foundation pillars: we pour 15–20 centimeters of sand into the hole, moisten it and compact it. After the sand has dried, add crushed stone to a height of approximately 10 centimeters. We pour a liquid bitumen composition on top of it to provide the pillars with reliable waterproofing.
After our waterproofed “cushion” has hardened, you can proceed directly to laying the foundation pillars. They can be made from brickwork or from concrete foundation blocks. We make sure that the columns are the same in height: later we will not have to fight with leveling the floor on the veranda.
If there is a cavity inside the masonry, it needs to be filled with some kind of construction waste - broken bricks, crushed stone - and filled with bitumen. It is best to coat the outside of both blocks and bricks with bitumen - it will not be superfluous.
The height of the blocks or pillars should be such that after laying the bottom trim, joists and boards, the vertical height to the floor in the cottage or house is 25–30 centimeters. This is necessary because presumably the roof of the veranda will be lower than the roof of the house (if we want to combine them into a common structure), that is, the ceiling of the veranda will also be lower.
Important: after each stage all new elements wooden structure need to be treated with special antiseptics.
 Veranda with outdoor fireplace.
 Stage 2. Making the base of the veranda
Now that we have the foundation pillars, we cover each of them with a piece of roofing felt for additional waterproofing. If it was not possible to line up the columns exactly horizontally, then later, before laying the joists or flooring, you will have to make special linings.
Now we put the lower trim, which will assemble our structure together. We place a beam on top of our covered waterproofing materials pillars, which we connect with a half-tree corner connection - this is the simplest option. To give additional rigidity to the structure, you can connect the corners with nails, but it would be optimal not to use metal, but to drill holes with a diameter of about 1.5 centimeters and drive spikes into them. Don’t forget to coat the level of the bottom trim with an antibacterial waterproofing agent for wood.
 Veranda frame.
 Stage 3. Making a frame for the veranda
In the corners of our veranda we hollow out or drill grooves for installing corner vertical posts. We install the racks, carefully checking that they are perfectly vertical. We reinforce the tongue-and-groove connection between the posts and the bottom trim with strong metal corners or brackets. Next, we install intermediate racks using the same principle. Usually they are placed at a distance of approximately 60 centimeters from one another - here everything depends solely on the wishes of the master and on the length of the material that will be used for the construction and cladding of the frame.
Important: do not forget to clearly check the distance between the vertical posts in those places where the window and door frames will be located: the frame must fit between two vertical posts.
 Corner veranda.
 By mounting the vertical posts, you can immediately make a window sill beam, which we will make from timber, connecting it to the vertical posts with a tenon connection. You can equip the window sill beam later, securing it with corners. After installing the vertical posts and tying them with a transverse (window sill) beam, we once again check the strict verticality of the structure.
On top of the resulting structure of racks sticking up, we install the upper frame - it will also be the Mauerlat on which the roof structure will rest. It is done according to the same principle as the lower harness.
Now we cut out incomplete (half or one-third) grooves for the floor joists in the lower frame, and incomplete grooves for the rafters in the upper frame. First, we place long beams along the wall of the house - the lower and upper purlins (the upper one is also called the beam) - on the lower and upper harness. We also cut out grooves in the purlins. We place floor joists (below) and rafters (above) across the purlins, fastening them either with a wooden spike (this is the most reliable) or with nails.
 Veranda with wooden steps.
 Stage 4. Stairs
Our design had to be elevated above the ground, and in order to be able to get to the veranda, it is recommended to purchase or make a staircase yourself. It can be a simple welded metal staircase, wooden on stringers, made of bricks, cast in concrete. It is only important to remember that the staircase should be independent of the house - it should be combined with the floor of the veranda only by the top, preferably a floating step. The staircase needs to be installed at this stage, so that then all the connection flaws (ugly joints, etc.) can be covered with floor boards.
 Floor covering for open areas.
 Stage 5. Floor installation
The floor can be installed at this stage or later, when the roof frame is assembled, but it is more convenient to carry out construction work by walking not on the joists, but on a ready-made foundation. So it is recommended that right now you place an edged board across the joists and nail it to the beam with stainless steel nails. This can be a finished version of the floorboard or a rough one. Later, the rough boards can be covered with linoleum or another type of flooring.
Remark: how to make a warm floor in the veranda
If the veranda is not cold, but warm, then the procedure for constructing the floor will be slightly different:
1. Place the strapping on top of the foundation pillars.
2. We lay the purlin (if it is needed, and it is needed if the length of the board is not enough, which we will lay in the next step) so that the upper level of the purlin beam coincides with the upper level of the strapping beam (this can be easily achieved if you use the connection of the beams “in half a tree").
3. We stuff boards on top of the purlin and strapping.
4. We lay waterproofing material on top of them.
5. We lay logs on top of the waterproofing without any cutting. You can also make a cutting and bend the waterproofing material into the resulting grooves and press it down with lags. We connect the logs with the second bottom trim (sometimes called the second crown).
6. Place in the resulting niches thermal insulation material. This can be expanded clay, slab or roll insulation.
7. We fill boards on top of the joists - this will be the finishing or rough floor of our veranda.
 Wooden veranda.
 Stage 6. Roof installation
We already have a mauerlat or top trim and a central girder (aka a bench). Now you need to install racks on the side of the wall of the house, so that later you get a pitched roof. First we set up the corner posts, then the intermediate ones. We connect the racks from above with a ridge girder, making sure that all racks are the same height.
Now we place the rafters with support on one side on the wall posts, on the other side on the Mauerlat (aka the top frame). You can lay the rafters with hollowing “half a tree”, or without - just attach them with corners or staples. Do not forget that our roof must have an overhang from the entrance to the veranda, as well as a small allowance from the side of the house wall so that rain and melt water does not flow down the back wall of the veranda. In addition, do not forget that it would also be a good idea to make a canopy over the stairs, at least over the top few steps.
Important: this article describes a highly simplified rafter system, which, however, is often used in the construction of summer houses, verandas, and gazebos. However, during the work, especially if the veranda is very spacious, it may be necessary to install additional elements: struts (supports the angle between the rafters and the post), intermediate posts (also called legs or chairs), purlins and tie rods (connect additional intermediate posts) and other elements, which will reduce the pressure of the roofing pie and rafters on the posts and trim, and also maintain the clarity of the corners of the structure.
 Veranda roof made of polycarbonate.
 On top of the rafters we attach a waterproofing material, which is secured with self-tapping screws. We fill counter-lattice boards along the rafters. They will play a double role: they will press the waterproofing harder and create a space between the finishing roofing material and the insulation, eliminating the possibility of rotting of the sheathing and rafters.
Next comes a layer of sheathing, which is placed across the rafters and, accordingly, the counter-lattice. The final stage is fixing the roofing material and covering the sides of the resulting gables with a suitable material (most likely the same one with which we will cover the walls of the veranda).
 You can use a wide range of materials to form the roof of a gazebo.
 Further, if you have a warm veranda, all work is done from the inside of the house. You need to fasten the insulation between the rafters (can be nailed to the rafters), cover it with a vapor barrier layer (can also be nailed), and then lay the lathing of the ceiling system on top. It can be a rough draft or immediately a final version for subsequent finishing.
Stage 7. Installation of doors and windows
If you will have a covered porch rather than an open one, now is the time to install door and window frames. We fix the boxes using self-tapping screws or nails. We fill the voids polyurethane foam. During the external cladding of the walls, it is better to remove the sashes (unless, of course, you have double-glazed windows) so that they do not suffer from vibrations when struck with a hammer or during operation of a screwdriver.
 Modern interior solutions allow your imagination to run wild.
 Stage 8. Sheathing the outside walls of the veranda
The material for the cladding and, accordingly, the method of its fastening are chosen by the owners of the house at their own request. The main thing when installing the outer covering is not to forget about the waterproofing layer, which is attached to the counter-lattice attached to the vertical posts. Insulation and vapor barrier are installed from the inside, similar to the roof. You can leave the veranda open by building only a high fence.
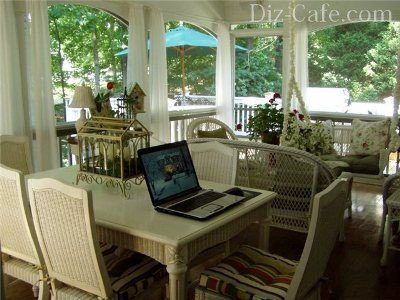
It is not surprising that the terrace of a country house becomes the epicenter of life in the warm season: it allows you to be in nature almost 24 hours a day, but in comfortable and comfortable conditions. It can perform several functions at the same time - serve as a living room for receiving friends, a dining area, a relaxation area and a large impromptu playground. There is a place for any family member to spend a comfortable time there.
Wooden terrace
Wooden terrace, what are they and their differences
The construction of a veranda and a terrace is mistakenly classified as one type of work, although there are fundamental differences between these two structures, as well as many similarities.


The first building is necessarily an integral part of the main building with which it is erected (as a rule) on a common foundation and can be closed or open.
The second structure is separate, even if it is adjacent to the house: it has a separate independent base.
How to make a terrace for your house with your own hands, detailed photo report:


The timber used for the terrace was dry (6%). Many elements were made independently.
Classic terrace

A classic terrace is a decked area that may have a lightweight roof to protect it from summer rain. It is located close to the house or adjacent to it, and can be located directly on the ground (hence the origin of its name: the Latin word “terra” - “earth”) or on some elevation.
But since nothing is permanent in the world, this structure has also changed, which is increasingly acquiring a roof and walls, and even windows and a door. Such a modern structure becomes an integral part of the design of the space near a home pool or artificial pond; it is erected as a separate building and equipped as summer kitchen or a picnic area with a stationary barbecue, oven, stove.
Picnic terrace

It is also actively used in winter: comfort and warmth can be provided in it, for example, by infrared heaters. Therefore, the line between these two structures, intended for summer pastime in nature, is gradually blurring and they can actually be distinguished only by the type of foundation.
Terrace with unusual lamps

If you still decide that we are building a terrace, then you should decide on its future appearance. In addition, they can be attached to the house or free-standing; they can be divided into three types according to their design. Completely open ones are mostly free-standing, although for houses built in modern styles, for example, high-tech, they are a completely organic addition. Their decoration is as laconic as possible, but elegant.
Terrace with open roof

Open with a roof is the most popular type. The roof can be made of roofing material and wood, or can be a light canopy made of awning or polycarbonate, and serves to protect from the scorching sun and precipitation. Protection from the wind can be used in the form of shrubs or plants for vertical gardening. External fences are not provided, except for a light fence in the form of wooden railings or forging.
Closed terrace, winter

Closed - all-season option. Like melting, it is fully equipped for a comfortable stay at any time of the year. But there are usually no blank walls - instead of them, large window openings are installed that let people into the room. large number Sveta. There is only one exception - the wall of the house to which it is attached. The roof can be anything, even insulated, but the most popular are translucent structures or, at a minimum, installation of a lantern in the center of the roof, which allows for maximum use of daylight.
The construction of a terrace can be done on one level or two - in this case, greater opportunities are provided for zoning and organizing space.
Design rules and terms of terrace construction

You can think about how to build a terrace both at the stage of designing a house and after, realizing that without having it on the site, country life is not complete. The need for it may also arise in the process of increasing the family: in this case, it becomes ideal place for meetings.
Therefore, its construction can be done at any stage of the construction or operation of the house, especially if you choose a material such as wood. In this case, its construction will not create any special inconvenience in life and will not stretch out over time: having started construction, for example, in March or April, it is quite possible to complete it by the beginning of the summer season.
Despite the fact that the structure being erected is lightweight, it is required to be included in the building's passport and to obtain permits for its construction, as for a capital structure. But before submitting it, you must decide on the terminology, that is, whether you will be building a veranda with your own hands or, after all, a terrace.
Summer extension to the house, veranda

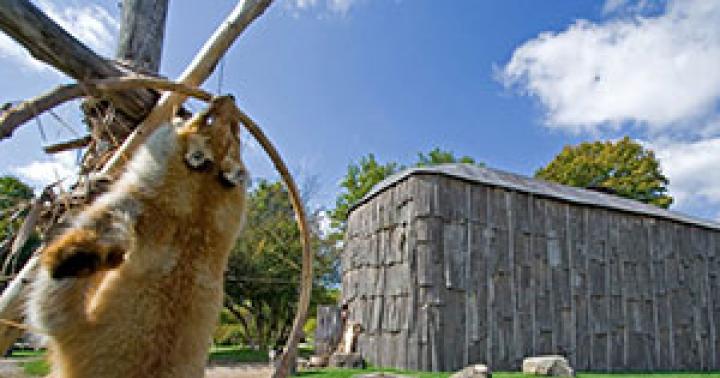
A summer extension made of wood can be built not only to a house built from the same material. It will be an organic addition to a stone or brick building. The main thing is to maintain the general architectural style in the design and the terrace you build yourself should succinctly fit into the surrounding landscape design. The presence of green spaces: trees or shrubs will not be an obstacle to the implementation of the idea: the former can be harmoniously introduced directly into the building itself, and the latter can become a beautiful frame for the perimeter, especially if you do not plan to install railings or other types of fencing.
When designing, it is advisable to take into account the following several provisions:
- the platform should be located on the south or south-west side of the building, but preferably near the entrance to the house or with the possibility of exiting it from the kitchen or living room;
- for hot southern regions, the location may be on the north side of the building, but only if it is planned to be used during the warm season;
- if the presence of a roof is not expected, then the floor should have a slight (up to 3°) slope in the direction opposite to the house;
- the roof should have a projection of 30-50 cm so that raindrops do not fall into the open structure.
What else should you consider before starting work?
Before building a terrace for your house, you need to accurately measure how much area can be allocated for it. The width should not be less than 2-2.5 m, as this is simply inconvenient - there is not enough space to place a dining table and other interior items, and the semantic and functional purpose of this room is violated. And if construction is planned at some elevation from the ground, then it is necessary to provide for the installation of fencing railings, which will perform the function of active safety when using the open area.
The most rational operation of a structure of the correct shape: square or rectangular. In addition, building a veranda with your own hands or making a remote summer area is easier and less expensive, since during construction, if the calculations are made correctly, there will not be a lot of lumber waste. But rectilinear forms are not always able to organically integrate into the existing environment, so when choosing the configuration and style of the structure, you must take this into account.
Number 1 material for construction
Terrace board

If we build a terrace with our own hands, then we will have to deal with the choice of materials for its construction independently. It is also necessary to calculate their number, which is determined by the area and other dimensions, equipment of the future structure.
The ideal material for such a structure is wood, products from which fully retain all the advantages, but do not lose any disadvantages. Therefore, before you begin to build a veranda for your house with your own hands or a summer open area on the site, it is necessary to carry out mandatory treatment of lumber with antiseptic and water-repellent agents and fire retardants. Further decorative finishing with paints, varnishes, stains and other means can be carried out only after this.
Wood could be an ideal material for such construction, but its fragility does not allow this. But true natural beauty, with proper care, can delight owners for several decades. For construction, it is better to use deciduous wood, characterized by a beautiful warm pattern, or larch and cedar. Pine, due to its resin and loose structure, is less preferable, especially for making logs and flooring.
Ideal material for summer outdoor areas
Composite decking

To build a terrace with your own hands, artificial material made from a wood-polymer composite is more preferable, especially if the building will be open, including exposure to moisture and sun. The decking or decking made from it has the advantages of wood, but does not have its disadvantages. In addition, you can purchase products from wood-polymer composite not only for flooring, but also for installing joists (beams) or finishing (various decorative elements).
Despite the fact that the cost of such material is higher than the average price of wood, using it to build a terrace with your own hands is quite justified. In this case, finishing costs are reduced - no painting or processing is required, the material is durable, does not require special complex care to maintain a presentable appearance, and most importantly, it is easy to work with and use a special tool for installation.
Kreg Deck Jig Tool for Installation Work

Building a veranda with your own hands, as well as laying the floor of a summer outdoor area, will be much faster and more accurate if you purchase a special tool for laying the deck board - the Kreg Deck Jig installation device, with which assembly will not take much time, even if it is performed by a beginner.
The tool is made of durable composite material with additional fiberglass reinforcement. His design features allow fastening even in hard-to-reach places. To increase the durability of the structures being built, it is recommended to use hardware from this manufacturer, which has a durable anti-corrosion coating and is equipped with a specially shaped head that prevents the material from splitting during screwing. Ease of use is also enhanced by the presence of a locking ring, which ensures drilling and screwing to a pre-adjusted depth.
Construction stages
Before you build a terrace with your own hands, you need to prepare its design, draw a sketch, according to which you can determine the total scope of the upcoming work, depending on the type of future structure. But for all types it is mandatory to install a lightweight foundation or base and lay flooring. For closed or roofed structures, the roof is installed and additional protective and decorative elements are installed: railings, window structures and others.
In the case when a terrace is attached to a house with your own hands, it can be erected on a pre-prepared foundation, but if it is missing, you will need to make one. But it is important that the foundation for this easy extension in this case is independent.
Choosing the type of foundation for the terrace

You can opt for a columnar foundation, since it does not require the use of special equipment, can be done independently, and the volume of excavation work is small. Suitable for building a terrace and piles, which can also be installed manually, but you will need the help of a friend.
It is quite possible to make a shallow strip base or use metal or concrete supports, but their installation requires the use of special equipment for driving into the ground. Similarly, you can carry out work on laying out the foundation and building a terrace with your own hands on a separate site, but in this case you can also provide for the possibility of making a concrete foundation, especially for an object located near the pool.
If the question arises of how to make a terrace directly on the ground, then you can limit yourself to a smaller amount of work. First, the construction site is cleared, the top layer of soil is removed from it, gravel or crushed stone is filled (possibly with sand), and for greater strength, a thin screed is poured on top. For the installation of flooring, it is also possible to lay it directly on the ground, but in this case, such a structure can be considered temporary, since its service life is limited, even if the wood is treated appropriately.
Installation of deck joists

Do-it-yourself summer recreation areas or verandas attached to the house must have the latest reliable connection. And this role is assigned to the logs, which are laid on the base or a pre-prepared grillage and inserted into the prepared holes in the wall of the volume. Thus, a kind of strapping is obtained, which should be fixed using anchor bolts. For free-standing structures, you should also lay the logs and secure them to the base and to each other using metal corners.
In this case, it is imperative to check the quality of processing of wooden beams with antiseptic, hydrophobic and fire-resistant impregnations, paying special attention to the end parts. After laying the logs and in the event that it is planned to install a fence or install a frame for a closed building, proceed with the installation of these elements. If the structure is being built as an open terrace with your own hands, then the next step is laying the flooring boards.
Making a terrace frame

In order to make the terrace closed, you will need to prepare a frame for its future walls. It can be made from either wooden beams or metal racks. The first option is more preferable, since it places less load on the structure and, in addition, does not require the involvement of welding work specialist Installation begins with the installation of vertical posts, which must have bandaging at the bottom and top. If the structure is attached to wooden house, then for fastening you can use bolted connections or self-tapping screws.
Bonding with a brick or stone building will require more effort: first the anchors must be installed, and then the dressing must be done with them.
After installing the frame, the construction of the terrace continues with the installation of fences, window structures and other elements provided for by the project. But if you need to figure out how to make a veranda with your own hands, then general order The steps are similar, but after installing the frame, you need to install the window sills to the planned height from the floor and start covering the walls. To do this, you can use wood products, for example, lining or other materials, including thermal insulation, if you plan to actively use the room in winter.
Roof for terrace

The question of how to make a terrace with a roof with your own hands can be solved in several ways. For open areas, it is enough to provide places for attaching umbrellas to protect from the scorching sun. For closed objects, a device of a special design will be required, the simplest of which is a lightweight metal or wooden frame for stretching the awning covering. In this case, the roof can be either permanent or removable.
In order to equip a more durable and solid roof, it will be necessary to manufacture a frame onto which floor beams are subsequently attached, the cross-section of which must be sufficient to support the selected roofing covering.
If you are building an attached open terrace with your own hands, the photo of which conveys the airiness of such a structure, the order of work will be as follows: a beam the length of the platform is attached to the wall, and a second one is installed parallel to it on the outside on racks. The first beam is attached to the wall with anchor bolts, and the outer beams are fixed to the supports using metal corners and self-tapping screws. Beams are installed on the timber, acting as rafters, and then the sheathing is mounted on them.
After this, you can begin installing the roofing material, the choice of which is not limited, but several conditions will need to be taken into account. It is not recommended to use heavy roofing products, as they create a serious load on the lightweight structure. It is imperative to take into account the architectural style of the house and the surrounding environment in order to avoid dissonance between them.
Polycarbonate terrace

For shaded areas, you can choose translucent materials, the most attractive of which is polycarbonate, available in different colors, lightweight, easy to install and inexpensive.
It is not prohibited to install glass structures, but their cost is high, especially if the structure area is large. In addition, they create a significant additional load on the load-bearing elements and have limited strength.
Attaching a warm veranda to the house will be more difficult, unlike the summer option. But a warm veranda can also be used as a living space and in this case it is more practical.
Today we will look at how to attach a warm veranda to your house, what materials can be used, and you will be able to make the right choice. The video in this article will also help you make a smart choice.
The veranda, in fact, is an integral part of a residential building, and therefore its style must correspond to the main style. But this does not mean at all that you cannot attach a brick veranda to a wooden house and vice versa (see). The main thing is that the final result is correct.
If the veranda is covered with the same roofing material as the main housing, then we can safely say that the style of construction has been preserved. Likewise, building it yourself will make the structure cheaper, and the price here is also important and can be quite high.
Planning and legalization of the project
It is so designed that the veranda is always built in the area of the main entrance to the house, and this is absolutely logical: what is the point, and why build it in another place. The purpose of the veranda is to protect the main entrance from precipitation and wind. It looks like you can relax in it, especially in the summer, when the heat outside subsides and all nature begins to revive.
So:
- What size the future veranda will have depends on the wishes of the owners. As a rule, a family is limited to building no more than the main wall of the house and this is quite enough for the average family. In any case, the size of the veranda should be proportional to the size of the main housing: if the house is small, then why do you need a large veranda, and if the house has two floors, then what is the point of building a one-story veranda.
- Whatever area the future veranda has, construction should be legalized. To do this, you will have to visit a special department that is developing relevant projects. After drawing up the project, you will have to visit the architectural department, where they will make changes to the house design and issue the appropriate building permit.
Attention: To avoid such red tape, it is better to plan the construction of a veranda at the planning stage of building a house. Even if there is not enough money to build it this year, you can safely build it next year. But it will take much less time to obtain permission and to draw a design for the veranda itself.
Marking and pouring the foundation
Once you have documents in hand indicating that construction is permitted, you can begin to prepare the site. To do this, they fence off the area according to the dimensions specified in the project, after which they remove the entire fertile layer of soil to a depth of 15 cm and transport it to the garden.
So:
- As a rule, either a strip or columnar type of foundation is chosen. If the construction of the veranda is carried out after the construction of the house, then you will have to prepare a separate foundation for the veranda.
- If at the stage of building a house, the project also includes the construction of verandas, then you can make one common foundation for the house and for the veranda, then unnecessary problems will not arise.
Attention: A separate foundation is built with a gap to the main one, equal to about 4 cm. When building a foundation for a veranda, you can use the old experience of building a foundation for a house. If you don’t have such experience, then you can hire builders.
Strip foundation
The strip type foundation is ideal for a veranda made of brick or foam blocks.

To obtain such a foundation, it is necessary to perform the following technological operations:
- Dig a trench along the entire perimeter of the future building, according to the specified dimensions.
- Formwork is installed from load-bearing wooden boards.
- Prepare a concrete solution by combining components such as 1 part cement, 3 parts sand and 6 parts crushed stone.
- The first layer of concrete is poured along the entire perimeter of the trench, after which it is reinforced with stones or broken bricks. You should get a layer of concrete about 10 cm thick.
- Such operations will be repeated until the concrete layer is level with the ground level.
- It is advisable to level the last layer with a trowel, after which the foundation is given time to set. This may take from 3 to 4 days.
- In hot weather, it is advisable to moisten the foundation surface with water to prevent it from cracking.
Columnar foundation
The columnar type of foundation can be used if the building is light in weight. These are mainly wooden frame structures with lightweight roofs.

To have such a foundation, you need to carry out the following work:
- Dig the required number of holes. There may be 4 or more of them, depending on the square footage of the building.
- A layer of sand up to 50 mm thick is poured onto the bottom of each pit.
- All holes are filled with concrete mortar at ground level.
- The ground part can be laid out with bricks, but before that, waterproofing is laid on the posts. The base of the veranda is aligned with the base of the main building.
Installation of subfloors
A warm veranda should prevent dampness and cold from the ground. Therefore, it is necessary to make a subfloor.
Technological stages:
- The resulting underground space is filled with expanded clay or other material.
- Two layers of roofing material are laid on the foundation for waterproofing.
- Placed on the foundation wooden joists, treated with an antiseptic.
- A rough floor is laid from edged boards, 50 mm thick.
Attention: If the veranda is built of brick, then you can make concrete floors. They are more durable than wooden ones, especially if thermal insulation is provided.
Construction of a wooden veranda frame
Building a wooden veranda is not so difficult if you follow some recommendations:

- The lower frame, consisting of beams 100x100 mm, is laid on the subfloor and nailed. The beams are also fastened at the joints made in half a tree.
- Grooves are cut in the beams of the lower trim for installing vertical posts. The distance between the grooves may vary, but not less than 50 cm.
- Vertical posts are installed in the grooves and securely fixed with nails. Each rack must be aligned using a building level or plumb line.
- The upper trim bars are mounted on top of the racks. They are attached in the same way as the bars of the lower trim.
- A purlin beam is nailed to the wall of the house, intended for fastening the rafters. The purlin beam is attached to the wall of the house using anchor bolts, like all wooden elements adjacent to the house.
- The rafter system is installed and secured.
- All wooden products should be coated with an antiseptic.
Roof structure
Since this is essentially an extension to the main building, the roof will be pitched:
- Design rafter system looks like a soul mate gable roof, while the slope angle of such a roof will be slightly less. Since the veranda is not a living space, it makes no sense to insulate the ceiling and walls.
- If you plan to equip the veranda as part of the living space, then you will have to carry out all the thermal insulation measures, from floor insulation to roof insulation.
Wall cladding and installation of windows and doors
After the frame is mounted, you can proceed to the next stage, which is sewing up the frame structure.
- Considering the fact that the veranda can be glazed along the entire perimeter, a window sill board is installed wherever windows are installed. In the veranda it is simply necessary, for example, for installing trays of flowers or seedlings.
- After this, you can sew up the openings between the vertical posts with plywood, OSB sheets or planed boards no more than 20 mm thick. This operation is carried out both outside and inside the building.
- After all, you will end up with a room in which only window and door openings remain. Subsequently, they need to be installed window frames and a door leaf with a frame.
- According to modern technology installation of windows and doors, they are installed, positioned as expected, fixed, and the spaces between the frames are foamed with polyurethane foam. It provides a reliable and sealed, and not rigid, connection.
Features of building a veranda made of bricks or blocks
A brick veranda can suit any house, wooden or brick. The whole question is what and how such a veranda will be finished. In this case, it will be better if the same technologies are used.
When building this type of veranda, you should use the following tips:
- For such a building, it is better to pour a strip foundation.
- You can do the laying yourself, so the construction is not very responsible. As a last resort, you can hire a craftsman or a team.
- For such a construction, a half-brick masonry will be sufficient.
- Subsequently, the veranda can be insulated, both outside and inside, and also lined with appropriate materials.
As a rule, the question is raised about whether it is worth insulating the veranda? It’s worth it if you want to make the veranda warm, but if you don’t have such a desire and the funds don’t allow it, then it’s not necessary. A warm veranda will cost much more than a cold one, especially since hardly anyone will live in it, although this option should not be discarded.
Floor insulation
Thermal insulation of the veranda from the floor is extremely important. After all, this is a rather large plane. As mentioned above, before you start insulating the floor in the veranda, you need to think carefully about whether it is worth spending additional money. The fact is that a warm or cold veranda is unlikely to affect the microclimate in the residential building as a whole.
- But if you plan to give the veranda to children so that they can organize a playroom there, or if there is a lack of living space, then it makes sense to install heating in such a veranda, which means that serious insulation measures will have to be carried out in the veranda, and you should start from the floor.
- In this case, the floor can contain at least three layers: a subfloor, a layer of insulation and a finished floor, and a facing layer consisting of laminate, linoleum, carpet, etc. is mounted on top of the finished floor.
How to insulate walls
The question of how and with what the veranda will be insulated from the inside must be resolved at the design stage, so as not to later break what has already been built. In this case, it all depends on what the veranda is built from: if the veranda is wooden, then one approach, and if it is brick or block, then a completely different one.
- If, then before sewing up the gaps between the vertical beams, a layer of insulation is laid between these same beams, with a thickness equal to the thickness of the beams. In this case, beams with a cross section of 100x100 mm were used. After sewing up the walls of the veranda, you get this kind of sandwich: wooden board or plywood, a layer of insulation and again a wooden board and plywood.
- If the veranda is brick or block, then a layer of insulation should be laid between the brick wall and the cladding layer, both from the inside and outside of the veranda.
- From the inside, such a veranda can be finished in several ways, using frame structures such as plasterboard, plastic lining or MDF lining.
- Frame structures make it possible to place the required layer of insulation between brick wall and facing material.
- As a material for insulation, you can use mineral wool or polystyrene foam boards, cut to the appropriate dimensions of the lathing cells.
Ceiling insulation on the veranda
If the veranda is warm, then special measures should be taken to insulate the ceiling:
- The hydrobarrier is installed first, then the surface is covered with beams with a cross-section of 27x27 mm. The beams are nailed at intervals of 0.8 meters. The seams obtained when laying the hydrobarrier are glued with metal tape.
- The gaps between the beams are filled with foam sheets. They are fixed in relation to the surface using self-tapping screws with a wide head. “Ecofol” is laid on top of the penoplex sheets and fixed with a stapler. Subsequently, this “pie” is pressed with a blockhouse, plywood or OSB sheets.
How to insulate a summer veranda
If the veranda is an extension to the house and it is decided to insulate it, then there is a high probability that it will have to be disassembled and then reassembled, but after carrying out comprehensive insulation measures. In any case, work should begin with the floor, namely with its disassembly.
- After this, the underground space will need to be filled with expanded clay, and then covered with a subfloor. The insulation layer in the veranda can reach 100 mm, after which the finished floor is laid. When laying insulation, it is advisable to ensure that the insulation is laid as tightly as possible.
- The ceiling is insulated with the same “pie”: a waterproofing barrier is laid on the rafters, a layer of insulation is attached, a vapor barrier is mounted, and decorative material is sewn on.
- Using this same technology, the walls of the veranda are also insulated. If the veranda was cold, then it is likely that the walls were covered with wooden shelving on only one side. The goal is to add an insulating layer in the spaces between wooden beams and sew it up on one more side.
- If necessary, you will have to change all wooden frames with glass to plastic windows with a single glass unit, otherwise the insulation effect will not work. This can also be said about entrance doors, which must have insulation.
Attention: If you approach the problem of insulation comprehensively, you can achieve the maximum effect.
Features of insulation from the outside
To get truly energy-efficient housing, it is necessary to insulate the veranda and the outside:
- As mentioned above, the veranda can be brick, block and wood. Each of these structures requires its own approach to installing insulation.
- A veranda made of bricks or blocks can be insulated in two widely used ways: by installing a ventilated facade or lining it with foam plastic or polystyrene foam boards, followed by cladding decorative plaster. Both methods are simple and therefore very popular.
- The ventilated facade is mounted as follows: lathing is placed on the walls of the veranda, in increments of about 40 cm. The lathing can be either horizontal or vertical. It all depends on the facing material used.
- If you plan to install siding, then the sheathing will be vertical; if it is plastic lining, then it will be either vertical or horizontal. The fact is that plastic lining can be mounted both vertically and horizontally.
- Any of the suitable insulation materials are installed in the spaces between the sheathing. It could be mineral wool or polystyrene foam boards. They should be well secured to the base.
- There must be a ventilated space between the insulation layer and the cladding. It will allow excess moisture to evaporate, which means that this border will always be dry.
- In conclusion, it should be recalled that work must be carried out only with working tools and with protective equipment, such as goggles, gloves, special shoes and a hat, not counting work clothes. Special attention You should pay attention to working with power tools, without which no construction site can do. It is especially necessary to monitor the serviceability of plugs, sockets, and connecting cables.
Now you can imagine how to build a warm veranda for your home. First of all, you need to choose the right material. The interior of a warm veranda can be selected after construction from a photo. The main thing is to correctly determine the dimensions and components, and the instructions will help you in this matter.
Closed and open, stone and brick, with full-wall windows and semi-shaded ones - verandas have long been transformed from small buildings that acted as utility rooms into spacious and functional rooms. If desired, the additional area becomes both a summer dining room and a refuge on a hot day, and, subject to careful insulation, winter garden. It is difficult to say what exactly the veranda should become: with your own hands, you can create a modest extension or a luxurious hall with equal success.
The veranda is never considered as a separate structure: it is a part of the house that is attached to the main building during the construction process or after some time. Most often it is adjacent to the facade or end side, that is, to the wall into which the door is mounted. Thus, to get into the house, you first need to go to the veranda.
Traditionally, extensions are divided into two types:
- open– the upper half of the walls is missing, and the roof is supported by beams;
- closed– the space free from the walls is glazed (in some cases, the area of the glass covering prevails over the area of the wooden part).
Designing the layout and appearance extensions, you should remember about harmony: the veranda should merge with the house, match its style, be built from similar materials, and be suitable in size. The optimal length of the room is 4-7 m, width – 2.5-3.5 m. A smaller area is not enough, and a larger one will look bulky.
Open verandas combine a porch and an equipped seating area. Wooden furniture, railings, floral decor create a homely feel, although the building is, in fact, located on the street

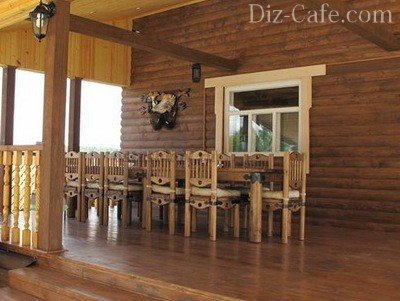
A small covered veranda serves as a hallway or dining room, especially in the summer. Here you can not only meet guests, but also chat with them over a cup of tea, sitting comfortably in an armchair
An open veranda is a great place for summer relaxation. There is everything you need to have a great time: fresh air, nature, comfortable furniture and saving shade
Usually, even indoor spaces are not heated, so the veranda is more often used in the warm season. Before construction begins, a number of precautionary measures must be taken.
Preparatory stage: documents and selection of materials
It is worth taking care of the future in advance. It is possible that in a few years you will have to sell, donate or rent country house, and then you will need documents that confirm the legality of the extension. Otherwise, you will have to pay a fine and get the same papers, but in a more complicated and lengthy way.
The first step is to contact the design organization so that, based on the provided sketches, a drawing and design of the future structure can be drawn up. In this case, it makes no difference how the veranda at the dacha was built: with your own hands or with the help of a construction organization. WITH finished project, application, passport and documents confirming ownership, you will have to visit several important authorities and wait for approval, after which you can begin construction. The final legal touch is the new registration of the house upon completion of the work.
Before visiting the design organization, you should create a sketch of the proposed veranda, where you must indicate the exact dimensions and location of doors and windows
In addition to the documentary side, there is also a financial side - the purchase and preparation of building materials. Main principle consists of compliance. For example, if a house is built of laminated veneer lumber, then the extension should also be made of wood. A veranda attached to a brick building must be made entirely or partially of brick. Combinations such as brick and foam blocks or wood and siding are absolutely unacceptable.
Main stages of construction
One of the options suitable for self-construction is a closed wooden frame veranda. Construction of the foundation, construction of walls, roofing work do not require large material investments and the use of construction equipment.

Diagram of the components of the veranda: 1 – racks; 2 – foundation pillars; 3 – lower trim; 4 – drain; 5 – pick up; 6 – double-glazed window; 7 – paneling; 8 – top trim.
Do-it-yourself veranda drawings will help you foresee any nuances and avoid mistakes. For example, the number, dimensions and location of double-glazed windows should be calculated in advance.
Step #1 - construction of a columnar foundation
After the top layer of soil has been removed and markings have been made, construction of the foundation begins. It would be great if it was analogous to the foundation of a house, but this is not always possible. The simplest and fastest is the columnar version.

To install the posts, various building materials are used: red solid brick, white sand-lime brick, concrete blocks, reinforced concrete beams, homemade concrete structures
Sequence of work:
- Along the perimeter (necessarily in the corners) of the future extension, holes for pillars are dug 1 m deep;
- gravel and sand cushions are placed at the bottom of the pits;
- produce waterproofing (bitumen);
- make a 15-centimeter concrete base;
- pillars are erected from bricks using ordinary masonry.
The height of the pillars is calculated based on the height of the floor of the house. To ensure that at the end of construction the roof of the veranda fits under the overhang of the roof of the building, the floor of the veranda is approximately 30 cm lower than the floor of the building.
Step #2 - installation of the frame
Creating a strong and stable frame for attaching wall elements is an important stage in construction wooden veranda with your own hands. The lower and upper trims are made, the material for which is logs (diameter 12 cm) or beams (8 cm x 8 cm, 10 cm x 10 cm). The connection is made using a “direct lock”.

It is better to start the construction of the extension frame with more powerful corner elements, gradually moving on to the remaining details - vertical and horizontal beams
When arranging the lower double trim, logs are cut in at the level of the 2nd log and racks are installed, which are secured with metal staples and nails. A second frame is installed in the upper part and rafters are installed. The upper ends of the rafters are connected to a beam located under the roof slope of the building. Bolts are used to connect horizontal elements and racks.
Step #3 – construction of walls and roof
How to upholster the veranda walls so that the frame can support the weight of the structure? For this, relatively lightweight materials are used - lining or boards. Each type of wooden material has its own installation features. For example, when the elements are arranged horizontally (which is preferable), the lining is fitted closely, plank to plank, and the boards are overlapped.

If the veranda is being built simultaneously with the construction of the house, a solid roof covering is used: the roof of the house smoothly merges into the roof of the veranda
Thermal insulation material is laid on the inside, which is sold in the form of slabs or rolls. The finishing of the room is carried out using plasterboard or chipboard panels. There are many options for decorating the interior: the design depends on the purpose of the veranda.
The roof configuration of the extension has several options, but the most popular is the shed roof type - simple to implement and, as a rule, ideally combined with the roof of the house. The rafters are located at an angle: the upper ends are fixed under the slope, the lower ends rest on the walls.

There are two options for designing ceilings: in the first case, they are sewn up with boards, in the second, they are left open
The same material that was used to equip the roof of the building is used as roofing. It is important that both texture and color match. Usually, when building a veranda with your own hands, they use a material that is easy to install, for example, soft tiles, metal tiles or roofing felt.
The procedure for laying roofing felt:
- boards are attached to the rafters in such a way as to create a dense flooring;
- roofing felt sheets are rolled out overlapping, securing the edges with galvanized nails;
- additionally fix the coating with slats located at the same distance from one another;
- the lower edge of the roofing is folded over and nailed down.
Step #4 – forming the floor
The best material for the floor is a treated wooden board about 30 mm thick.
When choosing a tone for painting a wooden floor, they most often choose translucent paints and varnishes that preserve the natural texture of the wood.
The width may vary, but usually products of about 85-120 mm are taken. The boards are placed on the joists using a thermal insulation layer. The top surface of the floor must be flat and smooth. Each part is treated with a protective agent, and after installation it is covered with paint or varnish.

A closed veranda is a complete home, protected from weather troubles. Having thought through the appropriate interior, it can be turned into a study, relaxation room, dining room or playroom for children
Video examples of the construction of such buildings
A veranda at the dacha can be built using ready-made double-glazed windows. Their sizes depend on the total area of the room and the degree of illumination. The more glass, the lighter the finished structure looks. Sliding structures are especially good, allowing you to turn closed veranda in the open.